Cyber Monday Sale Ends in

0Days

0Hours

0Minutes

0Seconds

Buy Lifetime Membership
×
Submit Your Site
Select Page

Aug 24, 2020 | Blog

How to display Divi pricing table with toggle on your website

Vishvendra

Vishvendra

This article uses a solution that can be achieved using any of the two plugins from Divi Extended. 1. Divi Plus 2. Divi Content Toggle
Pricing tables complete a business website. It tells your site visitors how much you’re charging, why you’re charging, and what they would get. If you’re using Divi as your WordPress theme, then Divi pricing table toggle is enough to fulfill this purpose.

Yet, long pricing tables filled with extra information can overwhelm a user.

Thus, in this article, we’re going to see how we can create Divi pricing table toggle. So, we can display useful information on our pricing table in a compact manner.

That’s it; let’s start creating ourDivi pricing table with toggle.

Step1: Create Divi pricing table layouts

The first thing you need to do is create some Divi pricing table layouts. Like one for monthly and another for yearly purpose, which you want to display on your website.

Divi pricing tables

For this, use the default Divi pricing table module, and once you’re done creating your pricing tables, save them in your Divi library.

Step 2: Download Divi Content Toggle module

To create pricing tables toggle, you have to download the Divi content toggle module.

For that, you’ve to purchase the Divi Plus plugin. It provides the user with multiple modules to do complex Divi designing easy & without any coding. The Divi Content Toggle module is also part of this versatile plugin.

Upload divi plus plugin

Once purchased the plugin, download it and then upload it to your WordPress dashboard to install.

Activate divi plus multipurpose plugin

After installing the plugin, make sure you activate it, and then in your WordPress sidebar, go to Settings >> Divi Plus. And make sure the content toggle module is enabled.
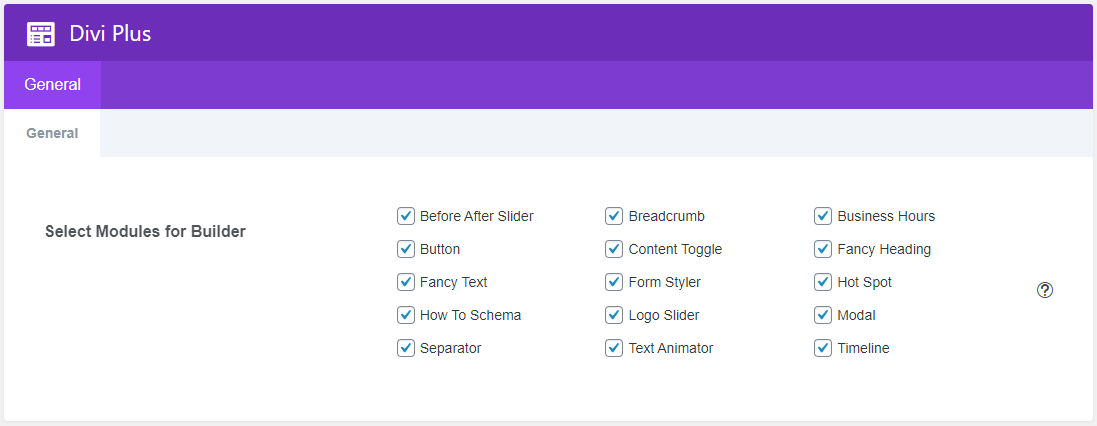
Divi plus panel

Step 3: Create pricing tables with toggle

After activating the Divi content toggle module, it’s time to create toggle pricing table.

To achieve this, create a new page or edit an existing one, where you want to display pricing tables with toggle.
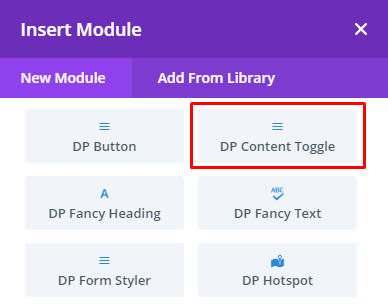
Insert divi plus content toggle module

Once the page builder gets loaded, insert the DP Content Module. And then, inside Content One and Content Two, select the pricing layouts that you saved earlier.
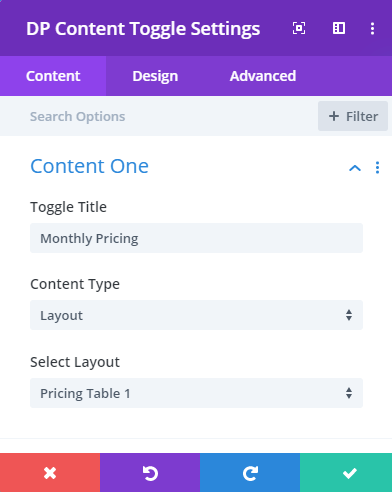
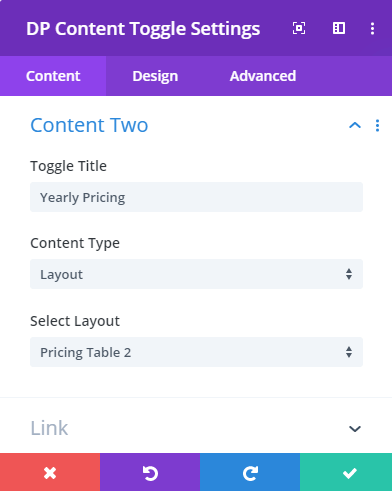
Divi plus content toggle settings
Divi plus content toggle module setting

That’s it; you’ve successfully added pricing tables with toggle. Below are some examples of Divi pricing tables with toggle created using the Divi Content Toggle module of the Divi Plus plugin.

Divi pricing table examples with toggle

[dipl_content_toggle content_one_title=”Monthly Pricing” select_content_one_type=”dipl_content_one_layout” select_content_one_layout=”196870″ content_two_title=”Yearly Pricing” select_content_two_type=”dipl_content_two_layout” select_content_two_layout=”196869″ switch_color_off=”#8585bd” switch_color_on=”#eeeeee” switch_bg_color_off=”#eeeeee” switch_bg_color_on=”#8585bd” _builder_version=”4.9.4″ content_toogle_header_font=”Montserrat|600|||||||” content_toogle_header_text_color=”#000000″ global_colors_info=”{}”][/dipl_content_toggle]
[dipl_content_toggle content_one_title=”Monthly Pricing” select_content_one_type=”dipl_content_one_layout” select_content_one_layout=”196940″ content_two_title=”Yearly Pricing” select_content_two_type=”dipl_content_two_layout” select_content_two_layout=”196941″ switch_color_off=”#09e1c0″ switch_color_on=”#eeeeee” switch_bg_color_off=”#eeeeee” switch_bg_color_on=”#09e1c0″ _builder_version=”4.4.9″ content_toogle_header_font=”Poppins|600|||||||” content_toogle_header_text_color=”#000000″ global_colors_info=”{}”][/dipl_content_toggle]
[dipl_content_toggle content_one_title=”Monthly Pricing” select_content_one_type=”dipl_content_one_layout” select_content_one_layout=”196899″ content_two_title=”Yearly Pricing” select_content_two_type=”dipl_content_two_layout” select_content_two_layout=”196900″ switch_color_off=”#0099e5″ switch_color_on=”#eeeeee” switch_bg_color_off=”#eeeeee” switch_bg_color_on=”#0099e5″ _builder_version=”4.4.8″ content_toogle_header_font=”Nunito|600|||||||” content_toogle_header_text_color=”#000000″ global_colors_info=”{}”][/dipl_content_toggle]
[dipl_content_toggle content_one_title=”Pricing For One Website” select_content_one_type=”dipl_content_one_layout” select_content_one_layout=”196919″ content_two_title=”Pricing For Two Websites” select_content_two_type=”dipl_content_two_layout” select_content_two_layout=”196920″ switch_color_off=”#31c56e” switch_color_on=”#eeeeee” switch_bg_color_off=”#eeeeee” switch_bg_color_on=”#31c56e” _builder_version=”4.9.4″ content_toogle_header_font=”Ubuntu|600|||||||” content_toogle_header_text_color=”#000000″ global_colors_info=”{}”][/dipl_content_toggle]
[dipl_content_toggle content_one_title=”Monthly Pricing” select_content_one_type=”dipl_content_one_layout” select_content_one_layout=”196997″ content_two_title=”Yearly Pricing” select_content_two_type=”dipl_content_two_layout” select_content_two_layout=”196998″ switch_color_off=”#f72a20″ switch_color_on=”#eeeeee” switch_bg_color_off=”#eeeeee” switch_bg_color_on=”#f72a20″ _builder_version=”4.9.4″ content_toogle_header_font=”Oswald|600|||||||” content_toogle_header_text_color=”#000000″ content_toogle_header_letter_spacing=”1px” global_colors_info=”{}”][/dipl_content_toggle]
Vishvendra

Vishvendra

0 Comments

Submit a Comment

Your email address will not be published. Required fields are marked *

Cyber Monday Popup