
")
Post archive is the best way to display our blog posts in a single place. It also increases the interest of the user to surf your website for a longer time. Plus, if you’re a Divi or extra theme user, then it’s much easier for you to create an intriguing Blog Archive. But the default native Divi blog module only has two decent blog layouts.
And if you’re a developer, then it’s not a big deal for you to create a custom blog layout. But it takes time and lots of coding. And, for non-technical users, coding is not an excellent option.
So, in this blog post, we will look at a third party plugin Divi Blog Extras. Using this plugin, we can customize our Blog archive without any coding and consuming time. This Divi Blog layout plugin has 6 modern and beautiful blog layouts. And many customization options that we can use to create our awesome blog page. Like, custom post type, custom taxonomies and Advanced sidebar widget.
The following are the steps, which you can use to create your own stunning and beautiful blog archive page in Divi 4 or Extra theme.
-
Step 1
The first and necessary step is to purchase Divi Blog Extras plugin. So, we can move on to the next steps in creating an awesome blog page. The above link will transfer you to the product page.
-
Step 2
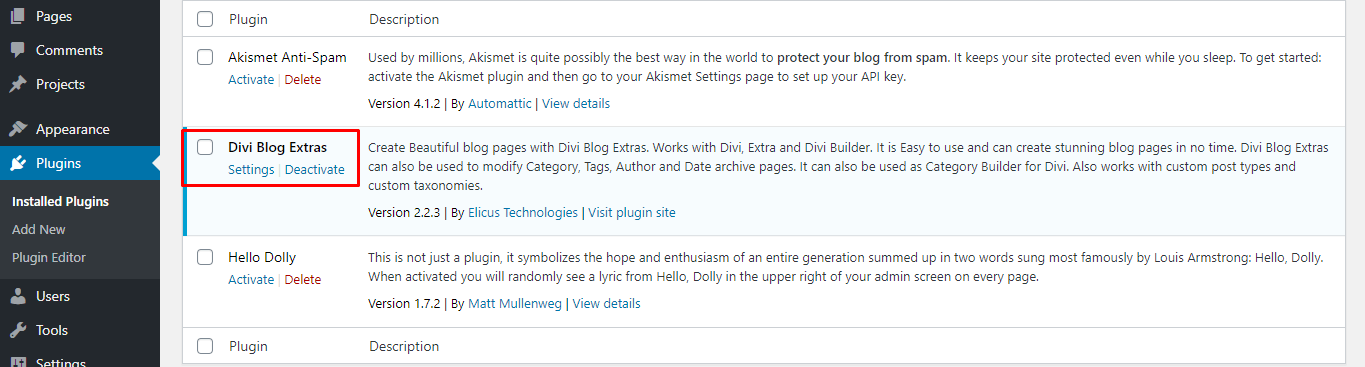
After purchasing the Extras plugin. You’ll receive a Zip file containing the Divi Blog Extras plugin. All you need to do is download and upload it to the WordPress.

After Uploading to WordPress, and activating it, you’ll find it in your plugin menu.
Now, we’re ready to move on our third step, which is creating an awesome blog archive page.
-
Step 3
First, create a new page and then launch Divi front End builder. You can also choose to design blog page in back end but I find it a little awkward. It’s like coloring a picture with closed eyes.
-
Step 4
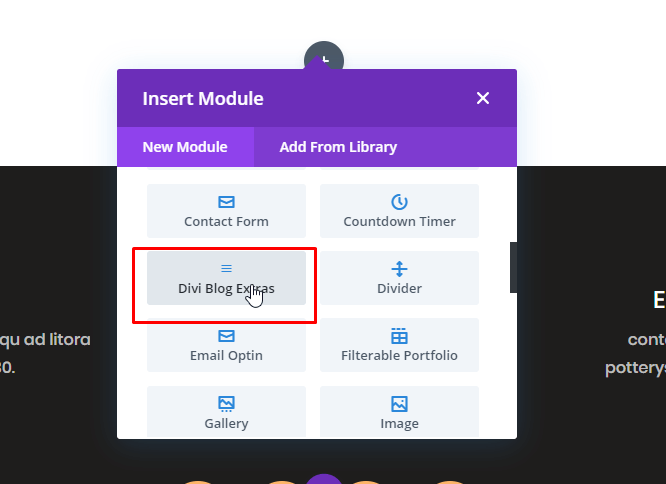
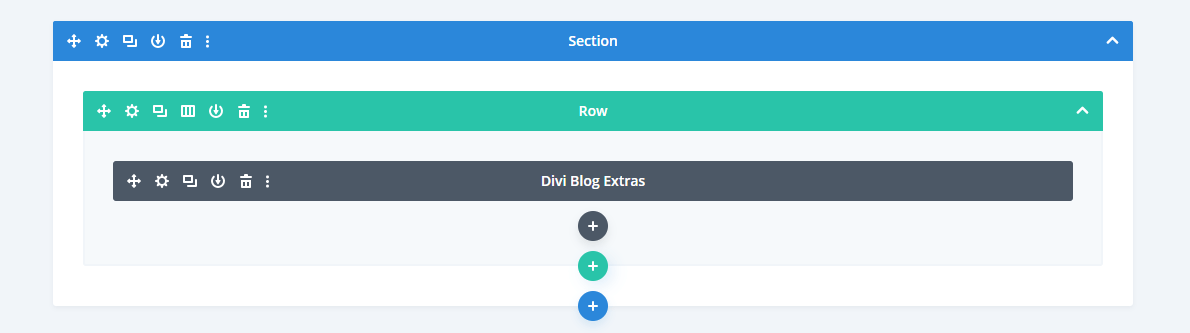
Now, all you need to do is add a section, then a row, and in row add Divi Blog Extras module from Divi modules.
You’re half way customizing the Blog page.
-
Step 5
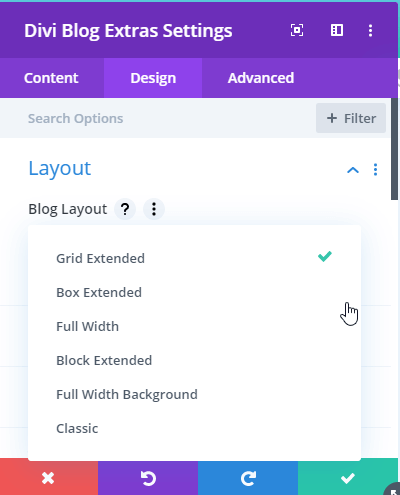
After, you’ve chosen the Divi Blog Extras module. It is time to customize it further. And selecting the desired Divi Blog Layout from 6 Blog layout options.
Tap on the settings button of Divi Blog Extras and customization menu will open.
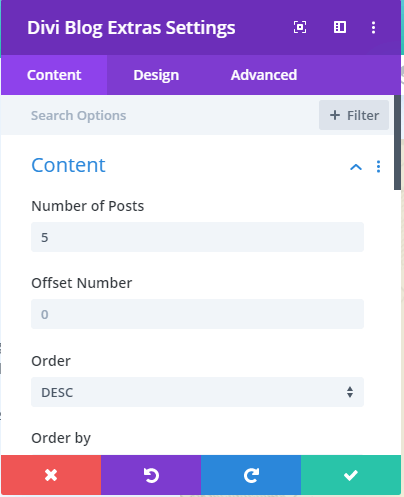
In Divi Blog Extras’ setting, you get three settings options. Content, Design, and Advanced. In content settings, you can choose the number of posts, option order posts, display excerpts, or complete content. Customization of the featured image, read more button, and lots of other customization.
Design setting allows you to select layout from six modern Divi blog layouts, overlay options; title, body and meta text customization.
Advanced settings gives feature of visibility, Custom CSS and more.
It is much easier to create a blog archive page with Divi Blog Extras plugin. Below are the archive designs created with each Divi Blog layout available in this plugin.
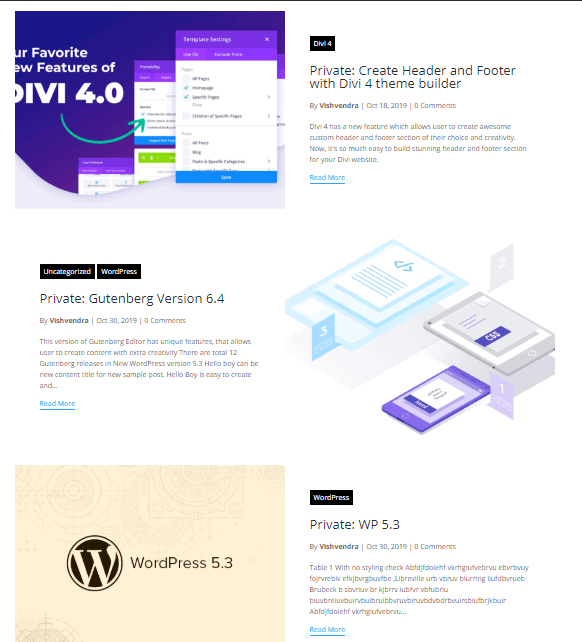
Grid Extended Layout
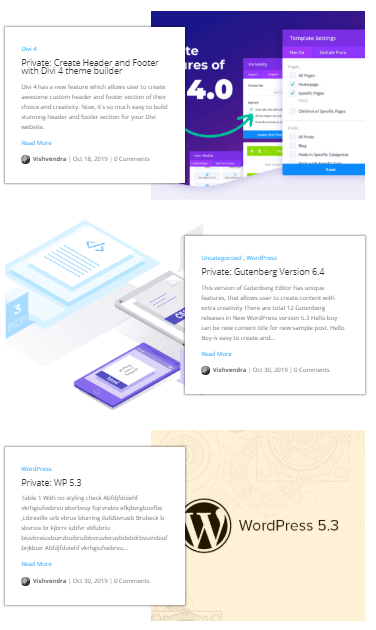
Box Extended Layout
Divi Blog Extras’ Full Width layout
Box Extended
Full Width Background
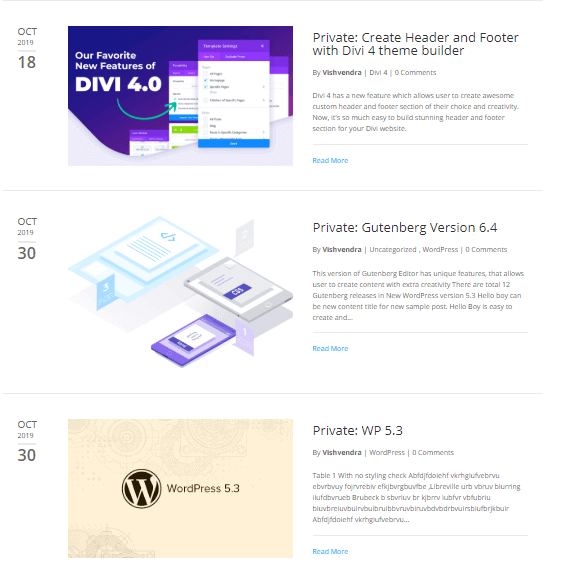
Divi Blog Extras’ Classic Blog Layout
Last but not least
Using Divi Blog Extras, you can also create custom posts and custom taxonomies. It also allows the user to create a custom category archive page.
Divi Blog Extras is a nice plugin for both developers and users without any coding knowledge. A perfect solution for creating a stunning Blog page in no time. If you’ve used this plugin before, then please write your views in the comment section. And share this post to help other Divi and Extra theme users to create stylish Blog Archive page.


0 Comments